How To Clear A Clogged Drain Trap
 One of the most common plumbing issues that homeowners face is a clogged drain trap. The drain trap is a curved section of pipe located beneath your sinks, showers, and bathtubs that is designed to catch debris and prevent it from clogging your pipes. However, over time, the drain trap can become clogged itself, resulting in slow drains or even complete blockages. Luckily, clearing a clogged drain trap is a straightforward process that can often be done without the need for a plumber. In this blog post, we will outline the steps you can take to clear a clogged drain trap effectively.
Step 1: Gather the necessary tools
Before you begin the process of clearing a clogged drain trap, it’s important to gather the necessary tools. You will need a bucket, a pair of pliers, a wire coat hanger, and possibly a pipe wrench. These tools will help you navigate through the process and remove any blockages efficiently.
Step 2: Locate the drain trap
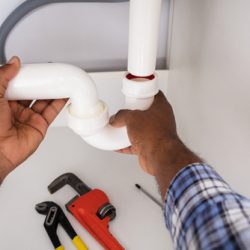
The next step is to locate the drain trap. The drain trap is usually located beneath the sink, shower, or bathtub. It is a curved pipe that connects the drain to the rest of the plumbing system. Before you begin working on the drain trap, it’s essential to put a bucket or towel beneath it to catch any water or debris that may come out during the process.
Step 3: Loosen the slip nuts
Using your pliers or pipe wrench, loosen the slip nuts on both ends of the drain trap. The slip nuts are located on the connections between the drain trap and the pipes coming from the sink, shower, or bathtub. Loosening these slip nuts will allow you to remove the drain trap and access any clogs that may be present.
Step 4: Remove the drain trap
Once the slip nuts are loosened, carefully remove the drain trap from its connections. Be prepared for some water and debris to come out during this step, so make sure your bucket or towel is handy. It’s also essential to be mindful of any sharp edges on the drain trap as you handle it.
Step 5: Clear the clog
Now that the drain trap is removed, it’s time to clear the clog. Take your wire coat hanger and straighten it out, leaving a hook at one end. Insert the straightened wire coat hanger into the drainpipe and use it to push and pull out any clogs that may be present. Be gentle but firm in your movements to avoid damaging the pipes.
Step 6: Reassemble the drain trap
After you have cleared the clog, it’s time to reassemble the drain trap. Carefully reconnect the drain trap to its connections, ensuring that the slip nuts are tightened securely. Use your pliers or pipe wrench to tighten the slip nuts, but be cautious not to overtighten them to avoid causing any damage.
Step 7: Test the drain
Once the drain trap is reassembled, it’s time to test the drain. Run some water through the sink, shower, or bathtub and observe how it drains. If the water flows smoothly without any signs of clogging, then you have successfully cleared the drain trap. However, if the water still drains slowly or there are signs of blockage, you may need to repeat the process or call a professional plumber for further assistance.
Summary
Clearing a clogged drain trap involves a series of simple steps that any homeowner can perform. By following these steps and using the right tools, you can effectively clear a clogged drain trap and restore proper drainage to your sinks, showers, or bathtubs. However, if you are unsure or uncomfortable performing these steps yourself, it’s always best to seek the help of a professional plumber to avoid causing any further damage to your plumbing system.
Got questions? Let us help! Contact us today to learn more about what we can do for you!
Categorised in: Drain Traps